DIY temporary are easy to make at home. All it takes is picking out a design that complements your skin tone.

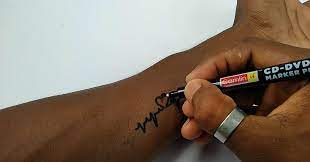
How to draw a tattoo
No matter the skill level, tattoo drawing can be an enjoyable way to express yourself creatively. But it is essential to familiarize yourself with basic drawing rules before diving in!
Practice drawing it on paper to find out how best to press down and place lines. Both will have an enormous effect on how the final artwork turns out.
Next, you need to create your artwork on water slide paper. This method works great for those who don’t have much time or need something short-term.
You can peel off the paper and admire your temporary tattoo. This method ensures a longer-term stay than other quick tattoo methods. It also prevents smudging.
Mehendi
Henna is one of the oldest forms of body art ever developed by man. It has its origin in India before becoming famous around the world.
Mehndi is an integral component of Hindu wedding ceremonies. It serves as an expression of beauty and symbolizes prosperity and joy for both partners.
Indian brides traditionally decorate their hands and feet with henna before getting married. Henna serves as a temporary tattoo that helps mark this momentous event.
Henna is an ancient natural plant used for centuries as a form of body art. You’ll find different shades available such as red and black hues.
Stencils
Stencils offer a cost-free solution to creating homemade temporary for your children’s enjoyment and creativity.
To create a stencil, print out your design onto a regular sheet of paper. You can use either a laser printer or a standard inkjet printer.
Once you have your stencil in hand, coat it with a perfume layer. This will help the ink adhere better to it. You can also use cologne or EDT products.
Once your tattoo stencil has dried, use permanent or washable markers to color your tattoo. You can use black or any color you desire. After coloring, place the stencil on your skin and press firmly. Then, lift off and let the marker ink dry before removing the stencil.
Gel pen
If you want to unleash your inner artist, a gel pen is an excellent way to craft homemade temporary at home. These pens are similar to writing pens but offer various effects with their vividly-colored ink.
These pens feature water-based pigment ink suspended inside a gel. When pressure is applied, they begin to flow when activated by stress.
A gel comprises pigment (for its color), water to keep it wet, and biopolymers. All these are combined into one package.
This stuff helps the ink flow smoothly by keeping it lubricated. Furthermore, it protects it from drying out too quickly, which could occur if your pen goes uncapped when not being used.
Since Sakura released its Gelly Roll pen in 1988, gel pens have come a long way. Now they boast various colors to meet artists’ and doodlers’ needs.
To use a gel pen for temporary , draw your design on your skin with the pen. Let it dry completely before touching it or rubbing it off. You can also use rubbing alcohol or baby oil to remove it if needed.

