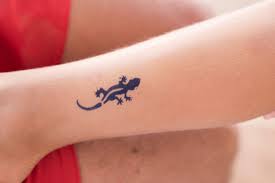
Are You Looking to Show Off at an Upcoming Big Game or Add Some Flair to Your Coachella Look with DIY Temporary Tattoos?
DIY temp tattoos are easy and fun ways to express your fandom at sporting events or Coachella; using products available from kitchen or craft supplies stores, you can quickly make one yourself!
Begin by designing on water slide paper.
Water slide paper DIY temporary tattoos offer an inexpensive way to experiment with new designs without breaking the bank. All that is necessary to create one are some household supplies and water slide paper.
Begin by selecting an eye-catching image you would like printed onto tattoo paper.
Subsequently, cut your image out with scissors leaving an approximate 1/2-inch margin around its perimeter.
Spray your tattoo paper front and back with any perfume of your choosing for an enjoyable project that will not only leave a cool tattoo behind but can be reused multiple times! Get creative and try creating different designs.
Design
Create your temporary tattoo design using an iPad drawing app like Procreate or upload hand-drawn designs directly onto your computer.
If the design includes words, ensure they will read backward after being applied to ensure a proper reading.
Once your tattoo is ready, trim its edges by cutting along its design lines. Be careful not to cut too close as that could destroy part or all of its image.
Apply perfume to the cut-out to prolong its stay on your skin and extend its duration. This step will also help ensure a lasting tattoo design on your body.
Choose any fragrance you please, but keep in mind that colognes and Eau de toilette contain more alcohol content than other types of odors.
Once this step is complete, put the tattoo into the water for three minutes to soak it before taking it out and spraying more perfume before pressing gently against your hand for some time – this will yield an eye-catching and beautiful tattoo suitable for use anywhere on your body!
Printing
No matter the occasion or purpose for which you need a temporary tattoo, DIY temp tattoos can make an easy and memorable way of showing off your personality and sense of humor! All that’s required to make DIY temp tattoos at home is a printer, paper, and a design!
Step One: Start by designing your image in Photoshop, Illustrator, or Microsoft Word – or you could even use an iPad sketch app – before moving on.
Next, print your design onto water slide paper sheets which can be found at craft stores and office supply stores.
Once your design has been printed, carefully cut it out using scissors or an exacto blade. Be careful to cut only a little bit, as that could result in the risk of cutting through its image and damaging its quality.
Once you’ve cut out your design, spritz a generous amount of perfume on your skin before placing the design on tracing paper and transferring it directly onto your body.
Applying
Applying temporary tattoos is simple! Lay the design on clean skin and use a cloth or sponge to apply water and pressure against its backside, which causes its adhesive layer to slide off your skin from underneath.
This method requires some practice but can produce beautiful results. Before beginning, sketch a design on a piece of paper that is both symmetrical and balanced.
Apply waterproof eyeliner over your design to secure it for longer. This will prevent the ink from bleeding off over time.
Once your eyeliner is dry, dust it with talcum or baby powder to seal in its ink and ensure that it will not run when put through the wringer. This step will protect its color against bleeding when put through the washing machine.
Finally, spray your design with hairspray, which will hold the ink in place for several hours and create a more realistic strategy.

